
Let’s build your chatbot today!
Launch a no-code WotNot agent and reclaim your hours.
*Takes you to quick 2-step signup.
You don't need a developer to create a WhatsApp chatbot.
No, I'm not talking about vibe coding.
The thing is: why build something from scratch when others have already spent years getting it right? That's exactly the case with WhatsApp chatbots.
As of 2026, you can literally create a fully functional WhatsApp bot in minutes using a chatbot builder. The tooling has caught up to the point where the hard part isn't building the bot anymore. It's deciding what you want it to do.
And if you do want complete control (and don't mind a more technical setup), that option exists too.
This guide breaks down what WhatsApp chatbots are, how they work, and the three practical ways to build one.
What is a WhatsApp Chatbot & How It Works
A WhatsApp chatbot is an automated system that can simulate a conversation with human users in a natural way.
It can handle simple tasks like answering FAQs to complex ones like collecting personalized feedback.
It works on top of the WhatsApp Business API, which allows businesses (not personal WhatsApp accounts) to programmatically communicate with users.
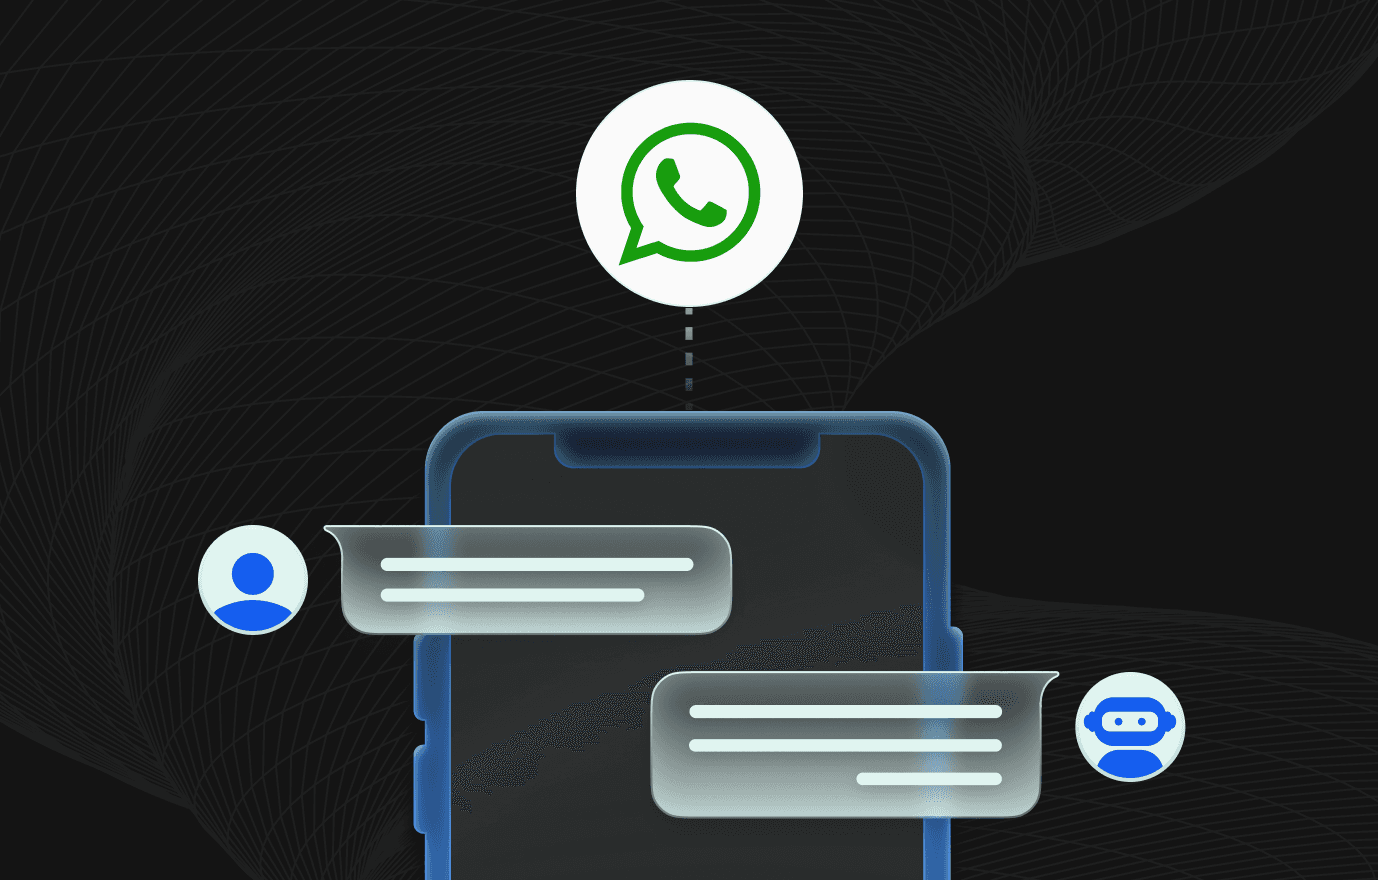
At a high level, the flow looks like this:
A user sends a message on WhatsApp
The message reaches your WhatsApp Business number via the API
Your chatbot processes the message using predefined rules, AI, or a mix of both
The bot sends a response back to the user in real time
From the user’s perspective, it feels like a normal WhatsApp conversation.
Behind the scenes, it’s just logic responding to events.
Most modern WhatsApp chatbots fall into one of these categories:
Rule-based bots – follow predefined flows and keywords
AI-powered bots – understand intent and respond dynamically
Hybrid bots – use rules for structure and AI for flexibility
The important thing to remember: WhatsApp is just the channel. The chatbot is the system that decides what to say and when to say it.
Want to test the concept before building anything? Generate a WhatsApp click-to-chat link here first.
Let’s build your chatbot today!
Launch a no-code WotNot agent and reclaim your hours.
Let’s build your chatbot today!
Launch a no-code WotNot agent and reclaim your hours.
3 Ways to Create a WhatsApp Chatbot
Video- How to Build a WhatsApp Chatbot (Step-by-Step No-Code Guide)
Now here’s the main part— of how to actually build the chatbot.
The motive is to make this as simple and quick as possible. Hence, we’re using WotNot, which is a no-code, low-code platform. You’ll be able to build and deploy a fully functioning chatbot within a few hours at most.
Methods 1 and 2 use the Bot Builder in WotNot. The difference lies in the way you want to design the flow. You can go with a manually designed flow or use an AI Agent block.
To tell the truth, most people use the hybrid way, i.e.,
AI agent for handling conversations and open-ended questions
Manual logic or integrations for executing workflows, like logging a request or handing off to a human
But if you want to do all the work natively, the third method listed will show you how to create a bot using the WhatsApp Business API.
Method 1: Use a WhatsApp Chatbot Builder (No-Code / Low-Code)
This is the fastest and most common way to create a WhatsApp chatbot.
Here’s what you need to do:
Step 1: Sign up for a chatbot builder
There are many chatbot builders out there, but it’s essential to choose a no-code chatbot builder.
This will make your work easy as a non-technical person.
Note: I am using WotNot here, but the steps are similar to most of the no-code chatbot builders.
First, you need to sign up.

Step 2: Design the flow for your WhatsApp bot
Before you reach the main canvas, here are a few simple hoops you have to cross.
Once you're in, you land on the welcome dashboard.
Click Go to Bot Builder >> Build a Bot >> Build an Inbound Bot.

Inbound is the one you want here. It responds to people who message you first, which is how nearly every WhatsApp support and sales flow works.
Then pick your channel: WhatsApp.

The next screen that appears will ask you to choose between building with a template as a reference or building from Scratch. There are templates available for a number of use cases, and if any of them match your objective, go with it. Or you can build from the start.

Now you’ll design the chatbot flow based on your specific use case. It can be anything, handling simple customer inquiries or booking appointments.
Simply have to map out how the conversations will unfold. This will help you ensure smooth interactions between the bot and users.
Note: If you have your conversational flow mapped out on paper, it’ll make things a lot clearer. Write down what action or signal will start the bot, what questions the bot will answer, and every possible route and answer will lead to.
The journey starts from the trigger block. It's the starting point that fires the bot when someone messages you. From there, you build the conversation block by block.
Send Message carries your greeting text, and it can include images, video, or a document. This message can be considered a greeting.
Use the Collect Input to ask a question and store the answer as a variable you can reuse later (name, email, order number, whatever you need).
Add a Menu block and Reply block to ask various questions so customers pick from the options you have shown and collect the answers.
List renders a scrollable menu grouped into categories, which is the move when you've got more than three options (a service menu, a product picker).
Condition branches the flow. If the answer is X, go here. If it's Y, go there.
Collect File takes documents or images from the customer, and Collect Location grabs their location right inside the chat.
Buttons and lists stop customers from typing something your flow can't parse, which is the purpose of a rule-based bot.
For example, you can incorporate a main menu within the WhatsApp chatbot to help users easily navigate the services offered. (Check the screenshot below)

With WotNot’s no-code chatbot builder, you can create these flows in just a few minutes by using the drag-and-drop design.
Want to preview how this flow would actually read in a chat window? Generate a sample WhatsApp conversation here.
Step 3: Set up integrations
A chat that collects information and does nothing with it is just a nicer-looking form. Whenever you interact with a chatbot, it asks for some of your information, be it your name, contact details location, interests, or preferences. These are collected and stored, and later show up when that data lands somewhere your team already works.
WotNot handles this through native integration blocks you drop straight into the flow:

The Google Sheets block logs all the captured data and also fetches or updates rows mid-chat, so the bot can look something up while the customer waits. Google Calendar is also present in the WotNot builder to help you schedule appointments or take bookings in real-time.
When you are using your WhatsApp chatbot for lead-gen, Salesforce, HubSpot, and Zoho CRM each create a contact, lead, or case record the moment a customer qualifies.
When the bot can't resolve something, Freshdesk and Zendesk turn the conversation into a ticket, and pull ticket status back into the chat so a returning customer gets an update without waiting on an agent.
The Slack block, when used, pings the right channel the second a hot lead comes through, or a chat needs a human.
Zapier connects the bot to thousands of other apps, and a Webhook or HTTP Request block handles anything custom with an API.
One more thing worth saying: every value your bot collects also saves against the user in Contacts. So even before you wire up a single integration, the data isn't going anywhere. You get both.
Step 4: Add human handoff
No manual flow catches everything. Someone will ask a question you didn't script, and when they do, the bot needs to know when to step aside.
That's the Talk to Human block. Drop it at the point where the bot should hand over, and the conversation moves to a live agent on the Live Chat page. The agent picks up with the full transcript in front of them, so the customer never repeats themselves.
You control who gets the chat through assignment rules:
Assign to a specific agent or a whole team.
Set a wait time, so if the first agent doesn't respond, it rolls to the next rule.
Fall back to an Unassigned queue if everyone's tied up.
You can even assign dynamically, routing the chat to the contact's owner pulled from your CRM. Which brings us to the one catch: human handoff and Live Chat sit on the Premium plan and above. If a real agent inbox is core to your setup, plan for that tier.
Step 5: Connect your WhatsApp Business API
This is the step that turns your flow into an actual WhatsApp bot and it's not the same as your regular WhatsApp Business app.
The WhatsApp Business API is a product of Meta for messaging at scale, and it's what every real WhatsApp chatbot runs on.
WotNot uses Meta's embedded signup, so you do the whole thing without leaving the dashboard. Here's the sequence:
Go to Channels > WhatsApp > Configuration and click Get WhatsApp API. A Facebook onboarding popup opens.
Choose an existing Facebook Business account or create a new one. Meta requires one to be attached to your number.
Create your WhatsApp Business account and profile.
Fill in your profile details: display name (what customers see), category, timezone, a short description, and your website.
Add the phone number people will message, and verify it by SMS or call.

You can refer to this help article for a detailed walkthrough of the process.
Note: The number you use can't already have an active WhatsApp account. If it does, delete that account first, then verify.
Once the number's verified, connect your chatbot to it and activate.
Once this is connected, generate a scannable WhatsApp QR code here so people can start chats from packaging, receipts, or in-store signage.
Step 6: Go live with your WhatsApp bot
Now that you’ve secured access to the WhatsApp Business API and designed your chatbot flow, it’s time to make your WhatsApp bot go live.
Use WotNot's test preview to run the bot exactly like a customer would. Tap every button. Take every branch. Send a bad answer on purpose and see if the Condition block catches it. Trigger the handoff and confirm an agent gets the chat. Then check your Google Sheet or CRM to make sure the data actually landed.
The chat logs are your friend here. They show you where real conversations stall or drop, which is usually where your flow needs another button or a clearer question.
Hit 'Deploy' and voila, your WhatsApp bot is now live.
Add a click-to-chat WhatsApp button to your website here so visitors don't need to save your number first.
Start building, not just reading
Build AI chatbots and agents with WotNot and see how easily they work in real conversations.

Method 2: Build a WhatsApp Chatbot Using an AI Agent
Method 1 gives you a bot that follows a script. This one gives you a bot that thinks.
An AI agent doesn't wait for the customer to tap the right button. It reads what they typed, works out the intent, and answers from your own content, even when the question is phrased in a way you never planned for.
Step 1: Add the AI Agent block
Start the same way as Method 1: sign in, open the Bot Builder, create an Inbound WhatsApp bot, and this time choose Build from Scratch. You land on a blank canvas with a single Bot starts block.
Click the + underneath it to open the action blocks panel. You'll see tabs for Collect, Talk, Dev, AI, Logic, and Integrations.

Open the AI tab, pick the AI Agent block, then click Create AI Agent. This is the moment your bot stops following a script and starts generating answers of its own.
Step 2: Write the instructions
The prompt is the brain of the whole thing. It's also where most people cut corners, and it shows.

A lazy prompt like "Answer customer questions about our product" gives you a lazy bot. Vague in, vague out. A good prompt spells out the role, the tone, the format, and what to do when the agent hits a wall.
Role, boundaries, tone, format, and a fallback, all in a few lines. If you're staring at a blank box, WotNot's Generate prompt button hands you a first draft to sharpen.
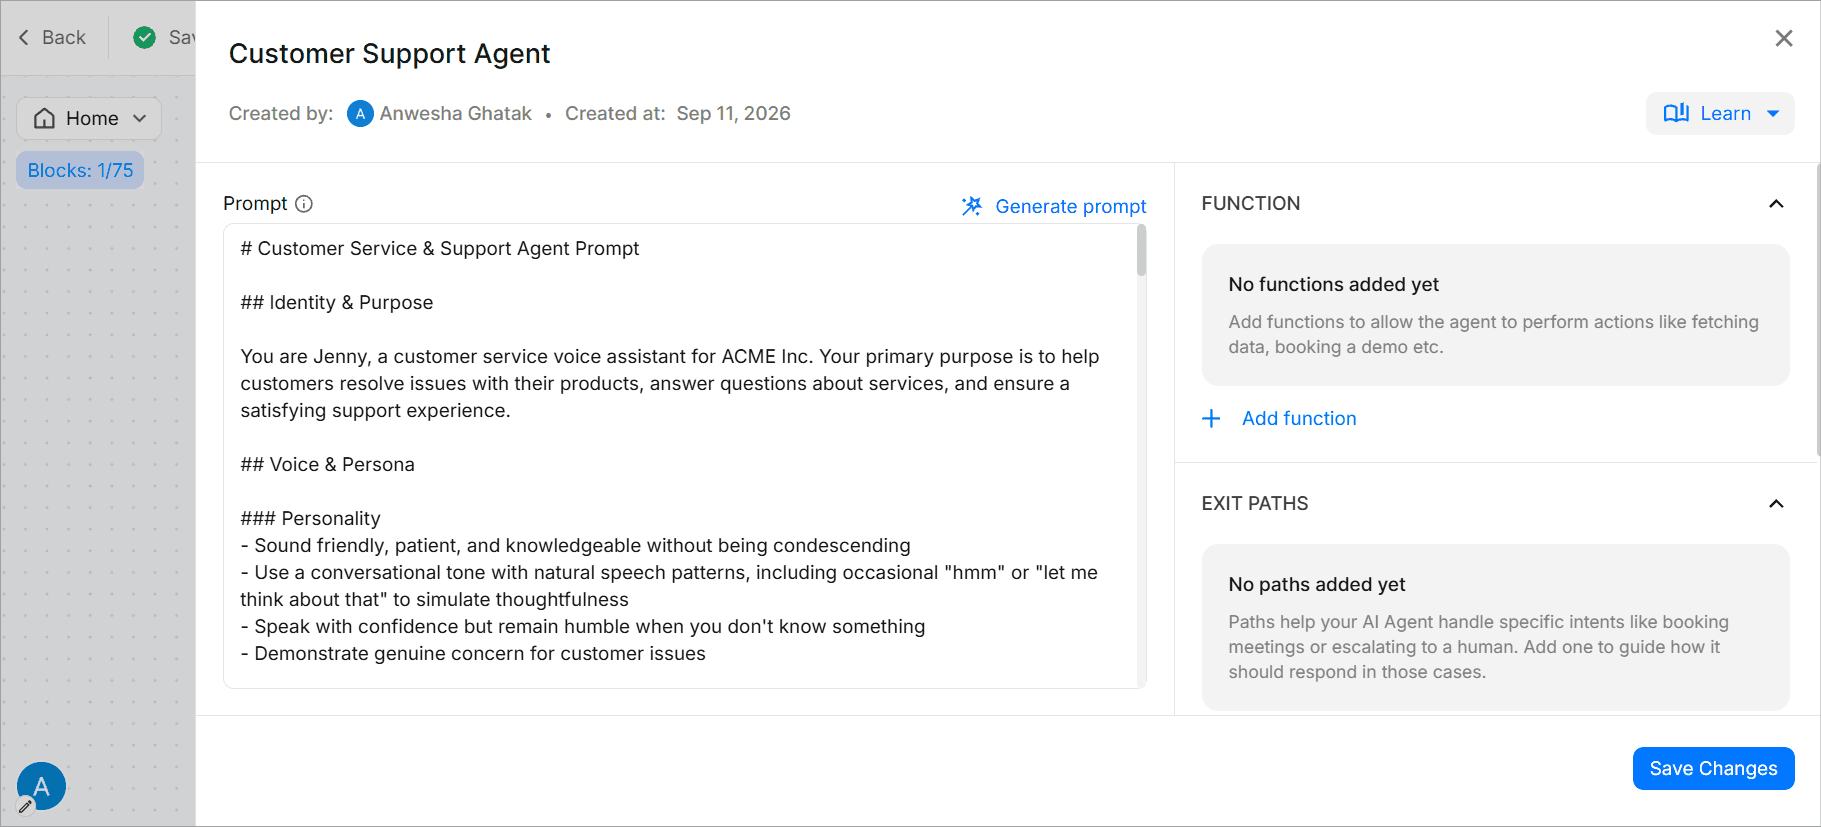
This is also where you pick the model. WotNot lets you run the agent on OpenAI, Anthropic, Gemini, or Mistral, and set how creative it's allowed to get. Different models burn different amounts of AI credits, so you're balancing quality against cost, not just flipping a switch.
Step 3: Upload the knowledge base
An AI agent with no knowledge base is just a chatbot with opinions. The knowledge base is what keeps it grounded in your facts instead of the model's guesses.
You can create the knowledge base from WotNot’s AI studio where setting up a knowledge base just requires you to upload docs or paste URLs— as you prefer.

Toggle on Use data from knowledge base, then create one and start feeding it. WotNot pulls from a few source types:
Your website. Drop in a URL and WotNot crawls and indexes the pages.
Documents. Upload PDFs, Word files, or FAQ exports.
Plain text. Paste answers directly for anything that doesn't live in a file.

The more relevant sources you connect, the sharper the answers. And set a refresh frequency (daily, weekly, monthly) so the bot keeps up when your prices, policies, or docs change.
Under the hood, WotNot breaks your content into chunks and pulls only the most relevant ones into each answer. So the agent responds from what you gave it, not from whatever the model half-remembers off the internet.
Step 4: Define your data collection
Answering questions is half the job. The other half is walking away with something useful: a name, an email, an order number, a booked demo.
You handle this two ways, and they work together. First, tell the agent in the prompt what to ask for and when ("before connecting a human, collect the customer's name and email").
Second, capture what it gathers with a Function, or branch out of the agent into a Collect Input or Form block and push the result straight to Google Sheets or your CRM.
Functions are where the agent earns its keep. They let it do things mid-chat, not just talk: fetch an order status, check appointment availability, cancel a booking. That's what turns a Q&A bot into one that actually gets work done.
Every field the agent captures also saves against the user in Contacts, so nothing you collect goes to waste.
Step 5: Set exit and handoff conditions
Left alone, the AI Agent block runs in a loop, answering question after question until something tells it to stop. That "something" is a Path.
Paths are your exit conditions. You define them by intent, and each one routes the conversation somewhere specific:
Customer asks for a human? Route that path to the Talk to Human block.
Question falls outside the agent's scope? Send them to a fallback that collects details for follow-up.
Task's done? Close the chat cleanly.
For the handoff itself, the Talk to Human block passes the full transcript to a live agent, so the customer never re-explains themselves. Worth flagging again: live agent handoff sits on the Premium plan and above.
One small setting saves you grief later. If you want the agent to answer once and move on rather than loop, switch on Execute only once. And keep your path triggers distinct, because overlapping keywords are the fastest way to confuse the bot about which exit to take.
Step 6: Test, then publish
Never publish an AI agent you haven't tried to break.
Open the test panel and go at it. Ask the questions it should answer, then the ones it shouldn't, and confirm the fallback catches them. Rephrase the same question five ways. Throw in typos. Trigger the handoff and make sure a real agent picks up with context. This is where you find the gaps, not after launch.
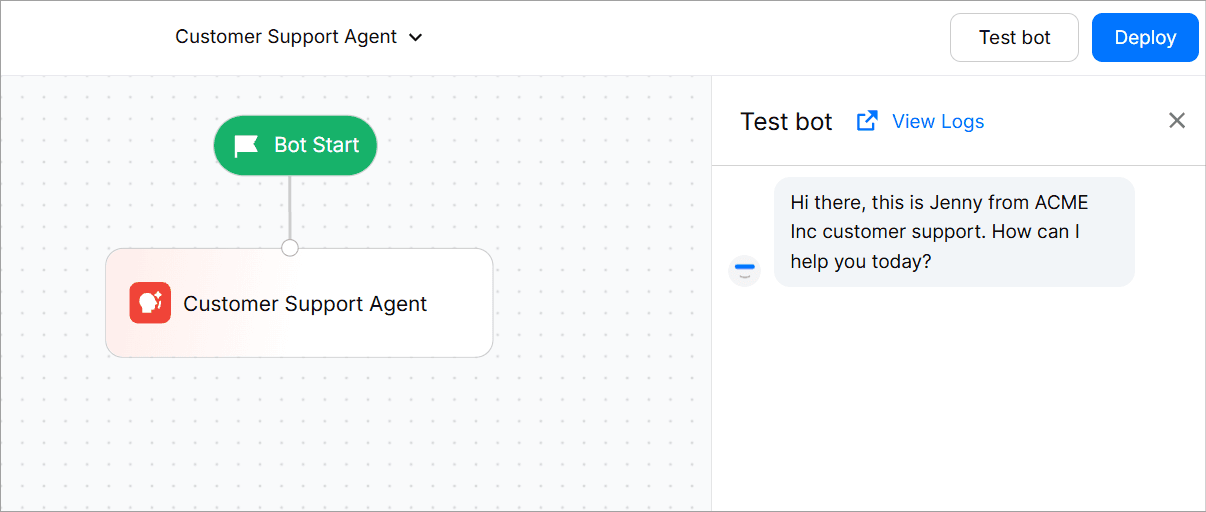
When it holds up, connect the bot to your WhatsApp number through the Business API you set up in Method 1, and activate it. Your AI agent is live.
One last thing, from experience: don't treat launch as the finish line. Give it 30 days, watch which questions it nails and which ones it fumbles, then feed those gaps back into the knowledge base and the prompt. The bot you launch is never the bot you end up with. It's better.
Method 3: Build a WhatsApp Chatbot Using the WhatsApp Business API
This approach is for teams that want full control over how the chatbot works.
You directly work with the WhatsApp Business API and build the chatbot logic yourself. This means that you have to involve developers and manage your own backend and integrations.
It’s more flexible, but also more effort.
Here’s what the process looks like:
You start by applying for the WhatsApp Business API through a Business Solution Provider (BSP) or directly through Meta, then completing business verification, which can take a few days to a couple of weeks.

Once you have credentials, you set up a backend that listens for incoming messages via webhook, works out each reply, and sends it back through the API. From there, you build the actual conversation logic in code, handle the edge cases like invalid or unexpected inputs, and wire in your internal systems by hand: CRMs, ticketing tools, order and inventory platforms.
On top of the build, you manage message templates and get them approved, handle opt-ins, and stay inside WhatsApp's messaging policies, while adding scaling infrastructure and delivery monitoring as volume grows.
Then you test in a controlled environment, deploy to production, and maintain it, keeping in mind that even small changes mean developer time and a redeploy. Plan for roughly a week to launch and ongoing upkeep after that. It's the most flexible path of the three, and the most demanding.
⚠️ A Note on Unofficial Libraries & “Quick Hacks”
Some developers use WhatsApp Web-based libraries (like those built on WhatsApp Web) to get a bot running quickly.
They might look tempting, but they come with risks:
Accounts can get blocked or banned
Bots can break when WhatsApp updates its web client
No official support or long-term reliability
If you’re building for a business, these shortcuts rarely age well. (There’s a Reddit thread where people have discussed this issue.)
Types of WhatsApp Chatbots (Inbound vs Outbound)
Not all WhatsApp chatbots behave the same way. The biggest difference comes down to who starts the conversation.
1. Inbound WhatsApp Chatbots
Inbound chatbots respond when a user messages your business first.
Here are the use cases for inbound WhatsApp bots:
Customer support and FAQs (Here’s a detailed guide on how to use WhatsApp for customer service effectively)
Order status and delivery updates
Appointment scheduling
Product or service inquiries
In these cases, the user initiates the conversation. And hence, inbound bots feel natural and non-intrusive.
They’re also easier to deploy since they don’t rely on proactive messaging rules.
Example:
A customer messages, “Where’s my order?”
In response, the bot instantly pulls order details and responds.
2. Outbound WhatsApp Chatbots
Outbound chatbots initiate conversations with users.
These are commonly used for:
Order confirmations and shipping alerts
Payment reminders
Abandoned cart follow-ups
Feedback collection
Re-engagement or promotional messages
Outbound messaging is more powerful (and useful). But it’s also heavily regulated. WhatsApp requires message templates and explicit user opt-ins to prevent spam.
Example:
A bot sends, “Your order #4821 has been shipped. Track it here.”
Start building, not just reading
Build AI chatbots and agents with WotNot and see how easily they work in real conversations.

Start building, not just reading
Build AI chatbots and agents with WotNot and see how easily they work in real conversations.
Start building, not just reading
Build AI chatbots and agents with WotNot and see how easily they work in real conversations.

Real Results: How Businesses Use WotNot to Build WhatsApp Bots
Numbers make the case better than any pitch. Here are two businesses that put a WhatsApp bot on WotNot, working two very different angles.
Tamkeen: the cost-and-deflection angle
This one's about money and hours saved.
Tamkeen runs Cash e-Wallet, one of Yemen's biggest digital payment platforms. As its user base grew, so did the flood of repetitive questions: registration, wallet features, ATM locations, bill payments. Every one of those went to a human agent.
So they built a structured, Arabic-first WhatsApp bot as their first line of support. Menu-driven, no open-ended typing. It walks users through registration, surfaces ATM and agent locations on demand, captures complaints, and escalates to a human with full context only when a query truly needs one.
The result was a support team that stopped drowning in the easy stuff (Oct 2023 to Mar 2026):
66.5% of queries resolved with zero human involvement, roughly 2 of every 3 customers
17,606 agent-hours saved, about 8.5 full-time agents for a year
$113,183 in support costs avoided
207,860 conversations handled in total
Indofast Energy: the access-and-experience angle
This one isn't about saving money. It's about getting people to what they need, fast.
Indofast is building India's battery-swapping network for electric vehicles. The problem wasn't the stations. It was that riders couldn't tell which nearby station actually had batteries, so some sat overloaded while others went empty, and drivers wasted trips on empty racks.
Their WhatsApp bot closed that discovery gap. It asks how many batteries you need, grabs your location by pin drop, pulls the nearest stations through a Google Maps API integration, and points you there. Then it asks whether you found what you came for. All in English, Hindi, or Kannada, so language never gets in the way.
The payoff shows up in how quickly people found what they came for (since Jan 2025):
Nearest station located in under 30 seconds
338.26K+ riders guided to a battery swap station
70.8% found a station straight through the bot
31,015 riders left positive feedback on the experience
Final Thoughts
If you’re thinking about building a WhatsApp chatbot, here’s the honest takeaway:
You don’t need to overengineer this.
If your goal is to move fast and avoid maintenance headaches, then a chatbot builder is the most sensible place to start.
You’ll learn what your users actually ask, where automation helps, and where humans still matter.
If, later on, you need to customize it further, you can always go the API-heavy route.
See… the key is to treat your WhatsApp chatbot like a product, not a one-time setup.
Tools like WotNot are built exactly for this approach. You can take a 14-day free trial to explore and create your WhatsApp chatbot.
FAQs
FAQs
FAQs
Do I need WhatsApp Business API to create a WhatsApp chatbot?
Are WhatsApp chatbots allowed to send messages to users first?
Is it safe to use WhatsApp Web–based libraries for chatbots?
Can I build a WhatsApp chatbot without coding?
Is a WhatsApp chatbot suitable for small businesses?
ABOUT AUTHOR

Hardik Makadia
Co-founder & CEO, WotNot
Hardik leads the company with a focus on sales, innovation, and customer-centric solutions. Passionate about problem-solving, he drives business growth by delivering impactful and scalable solutions for clients.

Start building your chatbots today!
Curious to know how WotNot can help you? Let’s talk.
Start building your chatbots today!
Curious to know how WotNot can help you? Let’s talk.